
Ready in: 30 minutes · Serves: 16 · Technique: No-Bake · Storage: Keeps in the refrigerator for up to one week.
Quick Answer
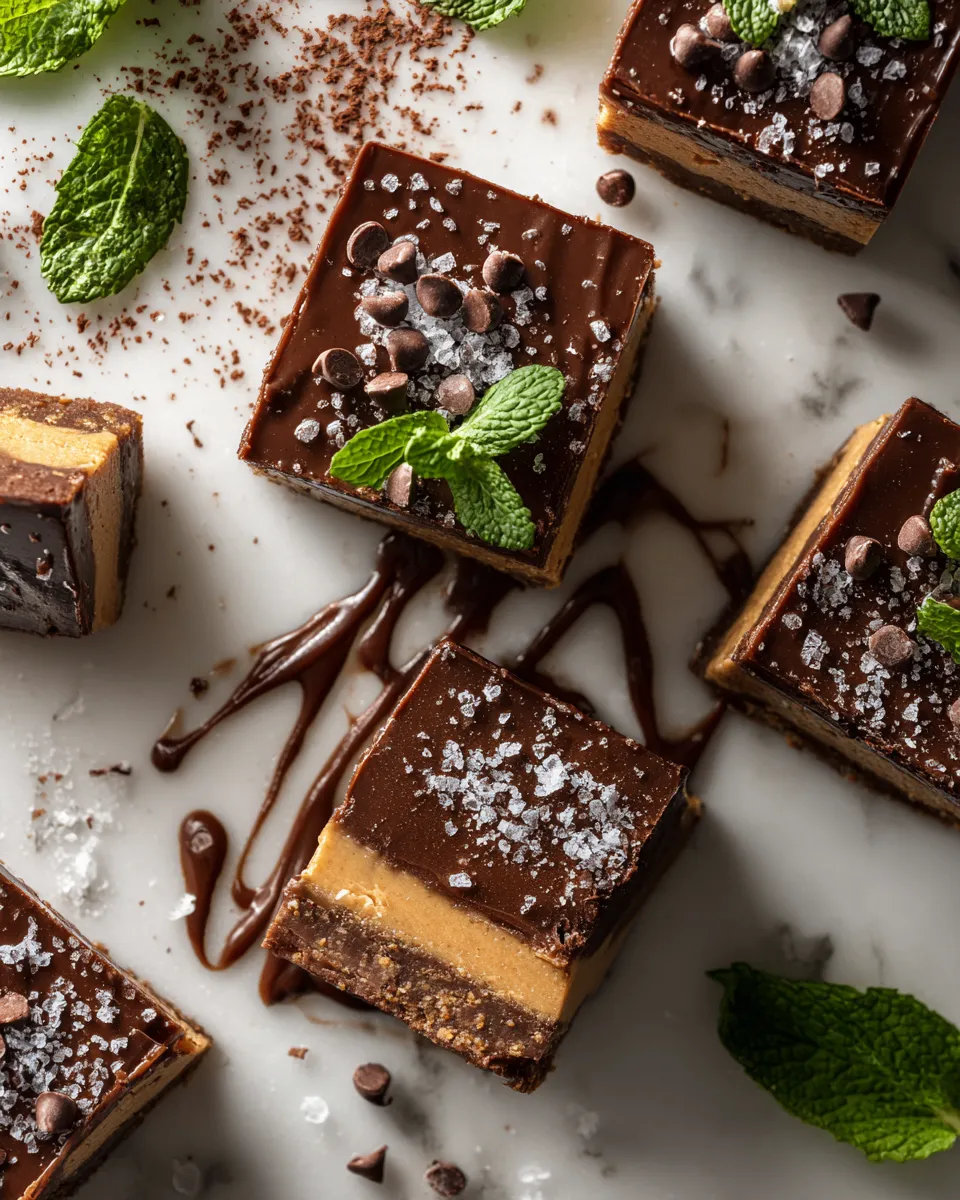
This Peanut Butter Chocolate Heaven is an easy, no-bake treat that combines creamy peanut butter and rich chocolate for a delightful dessert experience.
As the festive season approaches, there's something about the crisp air of New York City that draws me into the kitchen-especially when I think about holiday gatherings. The city is buzzing with excitement, and I can practically smell the sweet treats wafting through the streets. This year, I wanted to create a dessert that could bring warmth and joy to my friends and family, and that's how I stumbled upon this deliciously decadent Peanut Butter Chocolate Heaven recipe. It's an indulgent treat that perfectly combines the rich, creamy flavor of peanut butter with smooth, luscious chocolate.
A Cozy Holiday Treat

Why You'll Love This Recipe
- Delightfully rich combination of creamy peanut butter and smooth chocolate.
- Easy to make with simple ingredients that come together beautifully.
- Perfect for holiday gatherings and sure to impress your friends and family.
- Cuts easily, making it great for sharing and serving.
- Can be prepared ahead of time and stored for later enjoyment.
Ingredients
Gather these ingredients to create your Peanut Butter Chocolate Heaven:
Peanut Butter Layer
- 1 cup creamy peanut butter (Jif recommended)
- 1 cup powdered sugar
Chocolate Layer
- 1 cup milk chocolate chips (Ghirardelli preferred)
- ½ cup unsalted butter, at room temperature
- ½ cup heavy whipping cream
- 1 teaspoon vanilla extract
- A pinch of salt
How to Make Peanut Butter Chocolate Heaven (Step-by-Step)
This delicious dessert is simple to prepare and rewards you with rich flavors.
Step 1: Prepare the Peanut Butter Mixture
In a large mixing bowl, combine the creamy peanut butter and powdered sugar. Using a sturdy spatula, mix until it becomes a thick, homogeneous mass. The texture will be sticky and fragrant, filling your kitchen with a comforting aroma.
Step 2: Shape the Layers
Line an 8-inch square baking dish with parchment paper, allowing some overhang. Press the peanut butter mixture firmly into the bottom of the dish, smoothing it evenly with your spatula.
Step 3: Melt the Chocolate
In a medium saucepan over low heat, melt the unsalted butter and milk chocolate chips together, stirring gently until smooth and glossy. This step takes patience, as you want to avoid burning the chocolate.
Step 4: Add Cream and Vanilla
Once melted, remove from heat and whisk in the heavy whipping cream and vanilla extract until fully combined, achieving a silky finish.
Step 5: Combine Layers
Carefully pour the melted chocolate mixture over the peanut butter layer. Use a spatula to spread it evenly, allowing the two flavors to meld together.
Step 6: Set and Chill
Cover the dish with plastic wrap and refrigerate for several hours or overnight. This chilling time enhances the flavors and textures, making them even better.
Step 7: Serve and Enjoy
Once set, lift the dessert out using the parchment overhang. Cut into squares and delight in the beautiful layers before taking a bite-each mouthful is a heavenly mix of peanut butter and chocolate.

Common Mistakes to Avoid
- Using crunchy peanut butter: This can alter the texture of your dessert, so opt for creamy for the smoothest experience.
- Overheating the chocolate: Keep the heat low and stir constantly to prevent it from burning-trust me, the scent of burnt chocolate is nothing you want here.
- Skipping the chill: Don't rush this step! Allowing the layers to set properly will enhance the flavors and make cutting easier.
Tips and Tricks for Success
- Feel free to customize by adding a sprinkle of sea salt on top for that sweet-salty contrast.
- You can also substitute half of the milk chocolate for dark chocolate if you want a bit more intensity.
- This recipe can easily be doubled for larger gatherings-just increase your baking dish size accordingly.
Variations
- Substitute creamy peanut butter with almond butter for a different nutty flavor.
- Use semi-sweet chocolate chips instead of milk chocolate for a richer taste.
- Add crushed graham crackers to the peanut butter layer for added texture.
How to Serve
- Cut into squares and serve on a decorative platter.
- Pair with a dollop of whipped cream for added creaminess.
- Drizzle with extra melted chocolate for an indulgent presentation.

Make Ahead and Storage
- Make Ahead: This dessert can be prepared a day in advance to allow flavors to develop.
- Storage: Keep in an airtight container in the refrigerator for up to one week.
- Reheating: Best enjoyed chilled; there's no need to reheat.
- Freezing: Wrap tightly in plastic wrap and place in an airtight container for freezing. Let thaw in the refrigerator before serving.
Recipe Notes / What I Learned
While testing this recipe, I realized how simple ingredients can come together to create something truly divine. It's a reminder that the best memories are often made in the kitchen, surrounded by loved ones and the spirit of the season.
Yield and Serving Size
Yield: 16 squares · Serving Size: 1 square
Nutrition Snapshot
Estimated Nutrition Per Serving: ~250 calories · 4g protein · 30g carbs · 15g fat
Recipe by:
Indulgent Peanut Butter Chocolate Heaven
Ingredients
Equipment
Method
- In a large mixing bowl, combine the creamy peanut butter and powdered sugar. Mix until it becomes a thick, homogeneous mass.
- Line an 8-inch square baking dish with parchment paper, pressing the peanut butter mixture firmly into the bottom.
- In a saucepan over low heat, melt the unsalted butter and milk chocolate chips together, stirring gently until smooth.
- Remove from heat and whisk in the heavy whipping cream and vanilla extract until fully combined.
- Carefully pour the melted chocolate mixture over the peanut butter layer and spread it evenly.
- Cover the dish with plastic wrap and refrigerate for several hours or overnight.
- Once set, lift out using the parchment overhang, cut into squares, and enjoy.
Notes
FAQs
A: It's best to stick with creamy peanut butter for this recipe to ensure the smooth texture of the dessert.
A: You should chill the dessert for several hours, or ideally overnight, to allow the flavors to meld and the layers to set properly.
A: Yes, you can substitute half of the milk chocolate for dark chocolate to create a richer flavor.
A: Store it in an airtight container in the refrigerator for up to one week, or freeze it tightly wrapped for longer storage.
A: Consider adding a sprinkle of sea salt on top for a sweet-salty contrast.