
Ready in: 6 hours 15 minutes · Serves: 10 · Technique: Freezing · Storage: Airtight container in the freezer.
Quick Answer
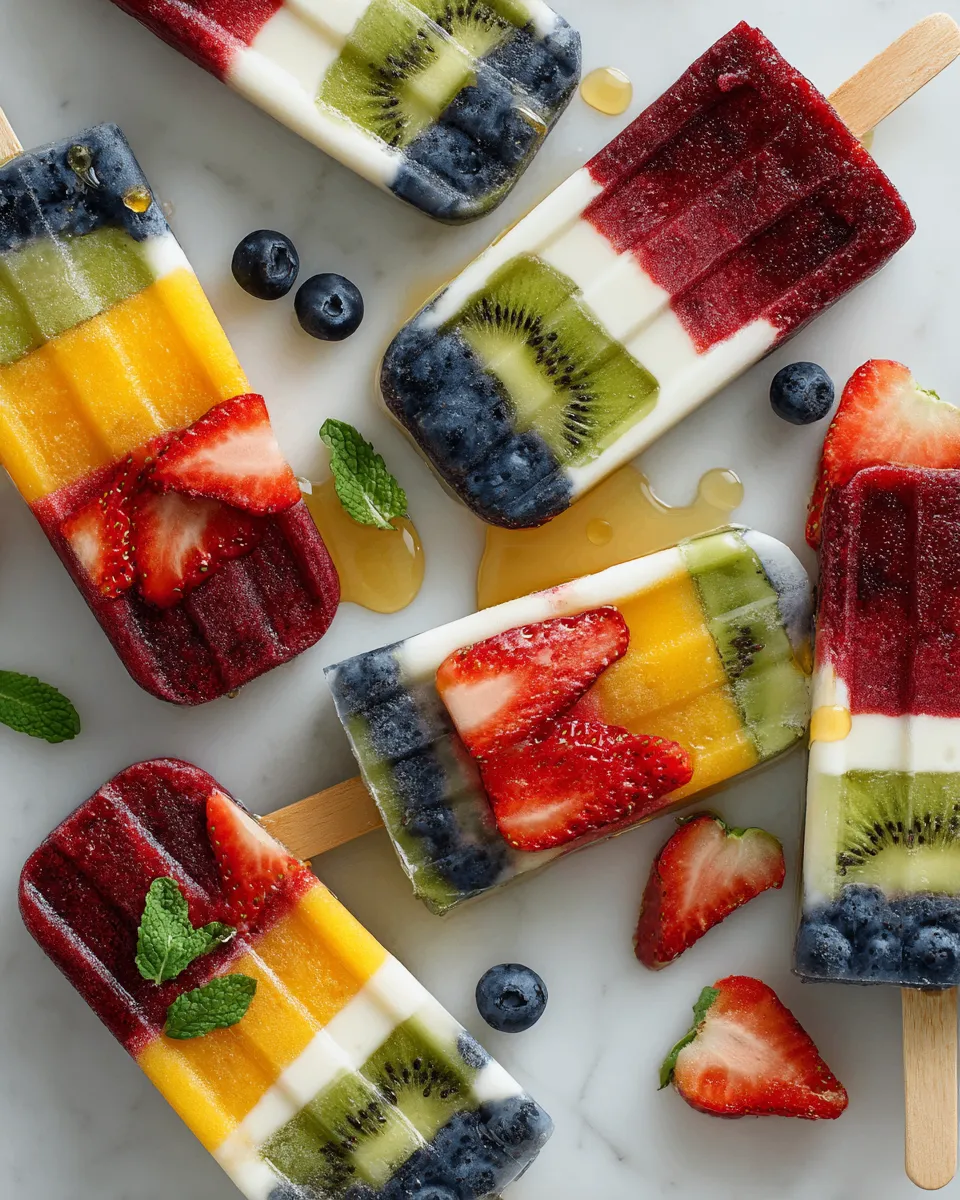
These Greek Yogurt Fruit Pops are a healthy and refreshing treat that can be easily made ahead of time and customized with your favorite fruits.
As the leaves begin to turn and the air takes on that crisp autumn chill here in New York City, I start dreaming up ways to celebrate the flavors of the season while also preparing for the festive events like Thanksgiving and Christmas. One delightful treat that has become a staple in my kitchen is Greek Yogurt Fruit Pops. These refreshing pops not only make for a perfect dessert but also a healthy snack option that satisfies my sweet tooth while highlighting the vibrant fruits that this time of year provides.
A Healthy and Refreshing Snack
Enjoy a versatile recipe that brings the flavors of autumn to life in a fun and guilt-free way!

Why You'll Love This Recipe
- Healthy and guilt-free snack option packed with nutrients.
- Refreshing treat perfect for autumn flavors using seasonal fruits.
- Easy to make with minimal ingredients and quick preparation.
- Versatile-customize with your favorite fruits or add-ins.
- Fun activity to enjoy with kids, making it a family-friendly project.
Ingredients
Gather these simple ingredients to create your Greek Yogurt Fruit Pops:
For the Yogurt Base
- 2 cups plain Greek yogurt (whole milk preferred)
- 2 to 4 tablespoons honey or maple syrup
- 1 teaspoon vanilla extract
For the Fruits
- 2 cups assorted fruits (fresh strawberries, blueberries, or sliced kiwi)
Additional Tools
- A mixing bowl
- A whisk
- Popsicle molds
- Sticks (if not included with your molds)
How to Make Greek Yogurt Fruit Pops (Step-by-Step)
Follow these easy steps to prepare your delicious Greek Yogurt Fruit Pops:
Step 1: Combine the Yogurt
In a large mixing bowl, I begin by adding the Greek yogurt. I prefer using whole milk yogurt for a creamy texture.
Step 2: Sweeten the Mixture
I add honey or maple syrup along with vanilla extract. Using a whisk, I mix everything until smooth and well combined.
Step 3: Prepare the Fruit
While the yogurt rests, I wash and chop the fruits into small pieces, ensuring they're colorful and ready to pop!
Step 4: Assemble the Pops
In the popsicle molds, I layer the yogurt mixture and fruits, swirling with a skewer for a marbled look.
Step 5: Insert the Sticks
If needed, I place the sticks in the molds straight. I freeze them for about an hour to hold the sticks in place.
Step 6: Freeze Until Solid
I then place the molds in the freezer for 4 to 6 hours, patiently waiting for them to be fully frozen.
Step 7: Enjoy
When I'm ready, I run the molds under warm water briefly to release the pops, and then I gently pull them out to enjoy.

Common Mistakes to Avoid
- Choosing Low-Quality Yogurt: Opt for a high-quality Greek yogurt that doesn't contain added sugars or thickeners. It makes a world of difference in texture!
- Skipping the Sweetener: If you skip adding a sweetener, your pops may turn out too tangy, especially if you're using plain yogurt. Balance is essential!
- Not Prepping the Fruit: Make sure to chop your fruits small enough to fit into the molds evenly. Larger pieces may not freeze properly and could break the pops apart when unmolding.
Tips and Tricks for Success
- Experiment with Flavors: Don't hesitate to play around with different combinations of fruits, such as using peaches or mangoes for a tropical twist.
- Add a Crunch: For added texture, consider mixing in chopped nuts or granola into your yogurt mix before filling the molds.
- Store Properly: Keep the pops stored in a sealed container or a heavy-duty freezer bag to maintain their freshness and prevent freezer burn.
Variations
- Replace Greek yogurt with coconut yogurt for a dairy-free option.
- Use agave syrup or stevia as an alternative sweetener.
- Incorporate fruit purees for a different texture.
- Add a splash of coconut milk for creaminess.
- Mix in spices like cinnamon or nutmeg for a seasonal flavor boost.
How to Serve
- Serve pops straight from the freezer for a refreshing treat.
- Drizzle with honey or chocolate sauce for added sweetness.
- Accompany with fresh fruit or granola on the side.
- Arrange pops on a decorative platter for parties.
- Add a sprinkle of chopped nuts for presentation and flavor.

Make Ahead and Storage
- Make Ahead: Prepare the yogurt mixture the night before and fill the molds for an easy grab-and-go snack.
- Storage: Store in an airtight container or heavy-duty freezer bag to prevent freezer burn.
- Reheating: Not applicable for popsicles.
- Freezing: Freeze for at least 4 to 6 hours until solid.
Recipe Notes / What I Learned
While developing this recipe, I discovered the sheer joy of experimenting with different fruits and flavors. There's something so satisfying in creating a treat that feels indulgent yet is filled with nutritious ingredients, perfect for family gatherings or quiet evenings at home. Plus, they are a hit with both kids and adults alike!
Yield and Serving Size
Yield: 10 pops · Serving Size: 1 pop
Nutrition Snapshot
Estimated Nutrition Per Serving: ~80 calories · 3g protein · 14g carbs · 2g fat
Recipe by:
Healthy Greek Yogurt Fruit Pops
Ingredients
Equipment
Method
- In a large mixing bowl, add the Greek yogurt. Using whole milk yogurt will yield a creamier texture.
- Add honey or maple syrup along with vanilla extract. Mix everything until smooth and well combined.
- Wash and chop the fruits into small pieces for easy layering in the molds.
- Layer the yogurt mixture and fruits in the popsicle molds, swirling for a marbled look.
- If necessary, place the sticks in the molds and freeze for about an hour to hold them in place.
- Place molds in the freezer for 4 to 6 hours until fully frozen.
- Run the molds under warm water briefly to release the pops, and enjoy!
Notes
FAQs
1. Can I use non-dairy yogurt for this recipe?
Yes, you can substitute Greek yogurt with a non-dairy alternative such as coconut yogurt or almond yogurt. Just ensure it's a thick variety to achieve a similar creaminess.
2. How long do the Greek Yogurt Fruit Pops last in the freezer?
The pops can last up to two months in the freezer when stored in an airtight container. However, they're best enjoyed within a month for optimal flavor and texture.
3. Can I use frozen fruits instead of fresh ones?
While fresh fruits are recommended for their vibrant flavor and texture, you can use frozen fruits. Just make sure to thaw them slightly and chop them before adding to the mixture.
4. What sweetener options can I use besides honey or maple syrup?
You can also use agave nectar, stevia, or coconut sugar as sweeteners. Adjust the quantity based on your taste preference, as some alternatives may be sweeter than others.
5. How can I make my Greek Yogurt Fruit Pops more colorful?
To enhance the colors, use a variety of fruits, such as raspberries, kiwis, and mangoes. Layering different colors in the molds will result in visually appealing pops!