
Ready in: 30 minutes · Serves: 4 · Technique: Frying · Storage: Up to 3 days in the fridge.
Quick Answer
To make a perfect Chicken Katsu, pound the chicken for even cooking, bread it with panko, fry until golden brown, and serve with tonkatsu sauce.
As the chill of fall settles into New York City, I'm beginning to think about the warmer flavors and comforting textures that greet us during the holiday season. One dish that never fails to bring a smile to my face is Chicken Katsu. It's not just a recipe; it's an experience-the perfect harmony of crispy panko coating enveloping succulent, juicy chicken. Whether I'm preparing for a casual gathering or a cozy dinner before diving into the holiday hustle, this dish is always a crowd-pleaser. Let's dive into the art of making Chicken Katsu!
A Cozy Holiday Treat

Why You'll Love This Recipe
- Deliciously crispy texture thanks to the panko coating.
- Juicy and flavorful chicken, seasoned to perfection.
- Quick and easy to prepare, perfect for holiday gatherings.
- Can be paired with simple sides for a complete meal.
- Great for both casual dinners and festive occasions.
Ingredients
To make this Chicken Katsu shine, you will need the following:
Chicken
- 2 boneless, skinless chicken breasts (about 1 pound total)
- Salt and black pepper, to taste
Coating
- 1 cup all-purpose flour
- 2 large eggs
- 1 cup panko breadcrumbs
- 1 teaspoon garlic powder
- 1 teaspoon onion powder
For Frying
- Vegetable oil, for frying
- Tonkatsu sauce, for serving
How to Make Chicken Katsu (Step-by-Step)
Let's dive into the art of making Chicken Katsu!
Step 1: Prepare the Chicken
Begin by placing the chicken breasts between two sheets of plastic wrap. Using a meat mallet, gently pound them to an even thickness of about half an inch. This not only helps the chicken cook evenly but also keeps it super juicy. Season both sides generously with salt and black pepper-the essence of flavor!
Step 2: Set Up Your Dredging Station
In three separate shallow bowls, set up your assembly line. In the first bowl, add the flour; in the second, beat the eggs until they're a sunny gold; and in the third, combine the panko breadcrumbs with garlic powder and onion powder. The aroma of the spices in the breadcrumbs will instantly make your kitchen feel inviting.
Step 3: Bread the Chicken
Taking one breast at a time, coat it in flour, shaking off any excess. Next, dip it into the egg mixture, allowing the excess to drip off before finally pressing it firmly into the panko mixture. The goal is to get a nice, even coating that will toast to a beautiful golden brown.
Step 4: Fry to Perfection
In a 10-inch cast-iron skillet, heat approximately a half-inch of vegetable oil over medium-high heat. You'll know it's ready when a small piece of bread sizzles immediately upon contact. Carefully place each breaded chicken breast into the hot oil. Fry for about 4-5 minutes on each side, flipping gently until both sides are crispy and golden. It's the sound of the crunch that sends me right back to my favorite Japanese eateries.
Step 5: Drain and Slice
Once cooked, transfer the chicken to a plate lined with paper towels to drain any excess oil. Let it rest for a few moments before slicing it into strips. The juicy center will be revealed-oh, the anticipation!
Step 6: Serve
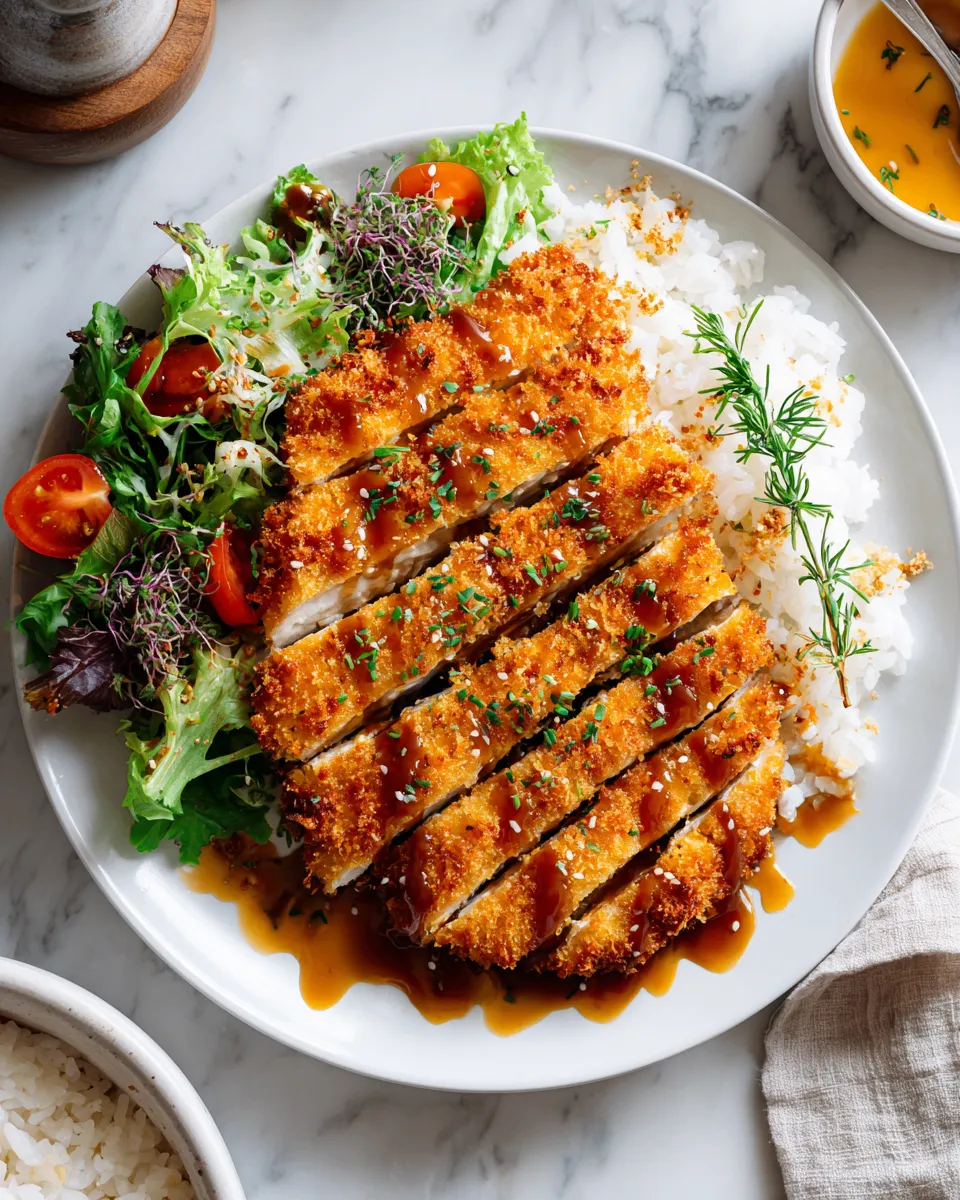
Plate it up with a drizzle of tonkatsu sauce. Serve your Chicken Katsu alongside steamed rice and a simple salad for a complete meal that's sure to impress at Thanksgiving or any holiday gathering.

Common Mistakes to Avoid
- Skipping the Pounding: Not pounding the chicken can result in uneven cooking; make sure to avoid this to ensure tender, juicy chicken!
- Adding Cold Oil: When frying, make sure the oil is hot enough. Cold oil can lead to greasy chicken rather than the crispy texture you desire.
- Overcrowding the Pan: Fry in batches if necessary. Overcrowding can lower the oil temperature too much, leading to soggy katsu instead of crispy perfection.
Tips and Tricks for Success
- Use Fresh Panko: For maximum crunch, opt for fresh panko breadcrumbs instead of the aged ones.
- Don't Skip the Seasoning: Seasoning each layer is vital for ensuring a flavor-packed dish.
- Perfect Oil Temperature: A deep-fry thermometer can help keep your frying oil at the sweet spot of 350°F.
Variations
- Swap chicken for eggplant or tofu for a vegetarian option.
- Try different sauces like sesame or spicy mayo for added flavor.
- Use different types of breadcrumbs, such as whole wheat, for a healthier twist.
How to Serve
- Plate with a drizzle of tonkatsu sauce on top.
- Serve alongside steamed rice for a complete meal.
- Add a simple salad for a refreshing complement.

Make Ahead and Storage
- Make Ahead: Prepare the chicken and breading in advance, then store separately in the refrigerator.
- Storage: Store any leftovers in an airtight container in the fridge for up to 3 days.
- Reheating: Reheat in the oven at 350°F for about 10 minutes to preserve crispy texture.
- Freezing: Chicken Katsu can be frozen before frying. Wrap securely and store for up to 2 months.
Recipe Notes / What I Learned
Through my journey with this Chicken Katsu recipe, I discovered the power of each ingredient-from the crunch of premium panko to the umami-packed tonkatsu sauce. This dish teaches you that simplicity can lead to the most satisfying meals, perfect for any gathering, especially during the holiday season. Enjoy every bite!
Yield and Serving Size
Yield: 2 servings · Serving Size: 1 chicken breast
Nutrition Snapshot
Estimated Nutrition Per Serving: ~450 calories · 30g protein · 40g carbs · 20g fat
Recipe by:
Crispy Chicken Katsu for Gatherings
Ingredients
Equipment
Method
- Place chicken between plastic wrap and pound to an even thickness. Season generously with salt and pepper.
- Set up three shallow bowls with flour, beaten eggs, and panko mixed with garlic and onion powders.
- Coat each chicken breast in flour, dip in egg, and press into panko crumbs.
- Heat oil in skillet and fry chicken for 4-5 minutes per side until crispy and golden.
- Transfer chicken to paper towels, let rest and then slice into strips.
- Serve with tonkatsu sauce, steamed rice, and salad.
Notes
FAQs
1. Can I use chicken thighs instead of breasts for Chicken Katsu?
Yes, chicken thighs work well for Chicken Katsu due to their higher fat content, which can make them even juicier and more flavorful.
2. Is there a gluten-free alternative for panko breadcrumbs?
Absolutely! You can use gluten-free panko breadcrumbs or make your own by processing gluten-free bread into crumbs.
3. Can I bake Chicken Katsu instead of frying it?
While frying gives the best texture, you can bake Chicken Katsu at 425°F for about 20-25 minutes, flipping halfway through, to achieve a healthier version.
4. What dipping sauces pair well with Chicken Katsu?
Tonkatsu sauce is traditional, but you can also serve Chicken Katsu with sweet chili sauce or a ginger-soy dipping sauce for variety.
5. How do I reheat leftover Chicken Katsu?
To maintain its crunch, reheat Chicken Katsu in the oven at 350°F for about 10 minutes instead of the microwave.