
Ready in: 1 hour · Serves: 16 · Technique: Baking · Storage: Refrigerate for up to 5 days.
Quick Answer
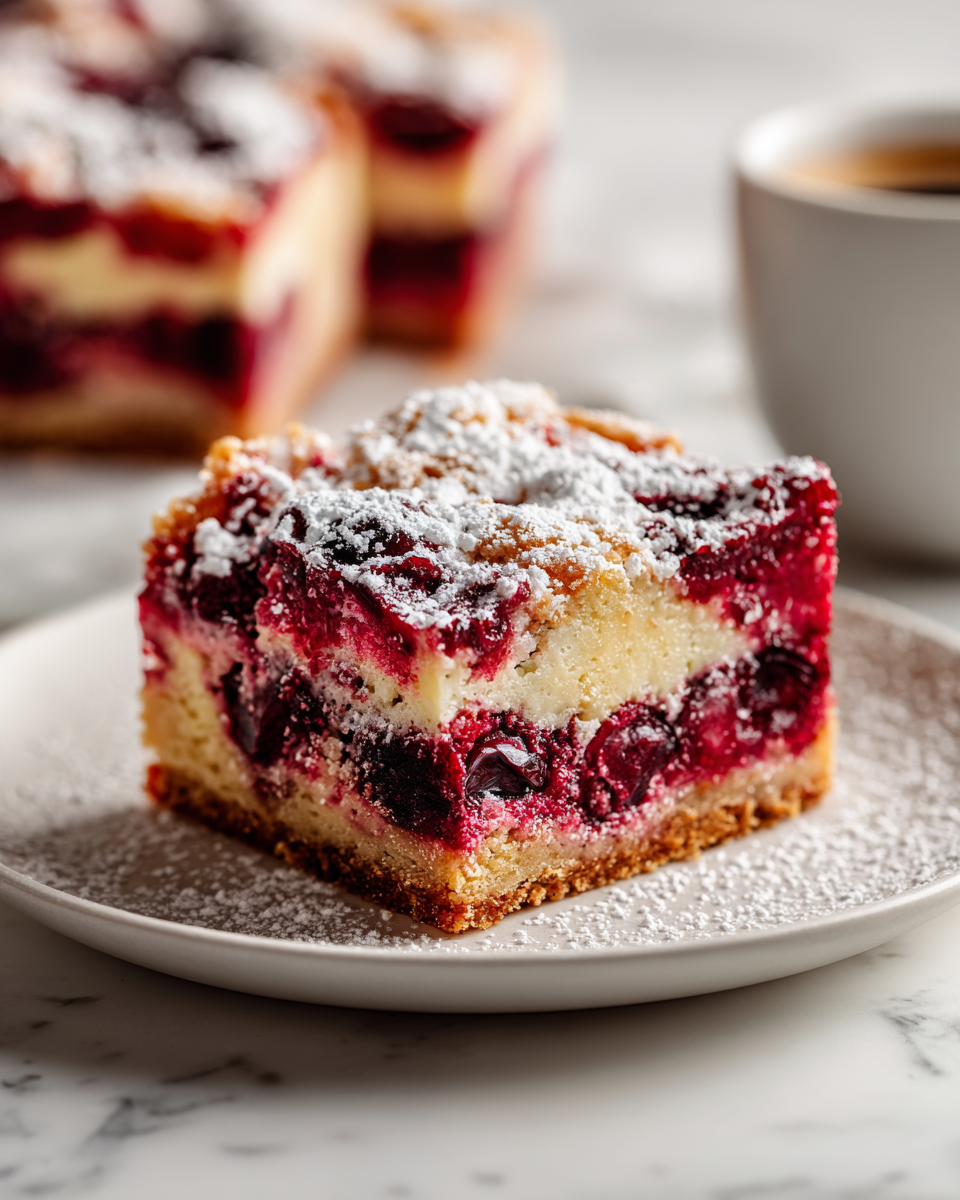
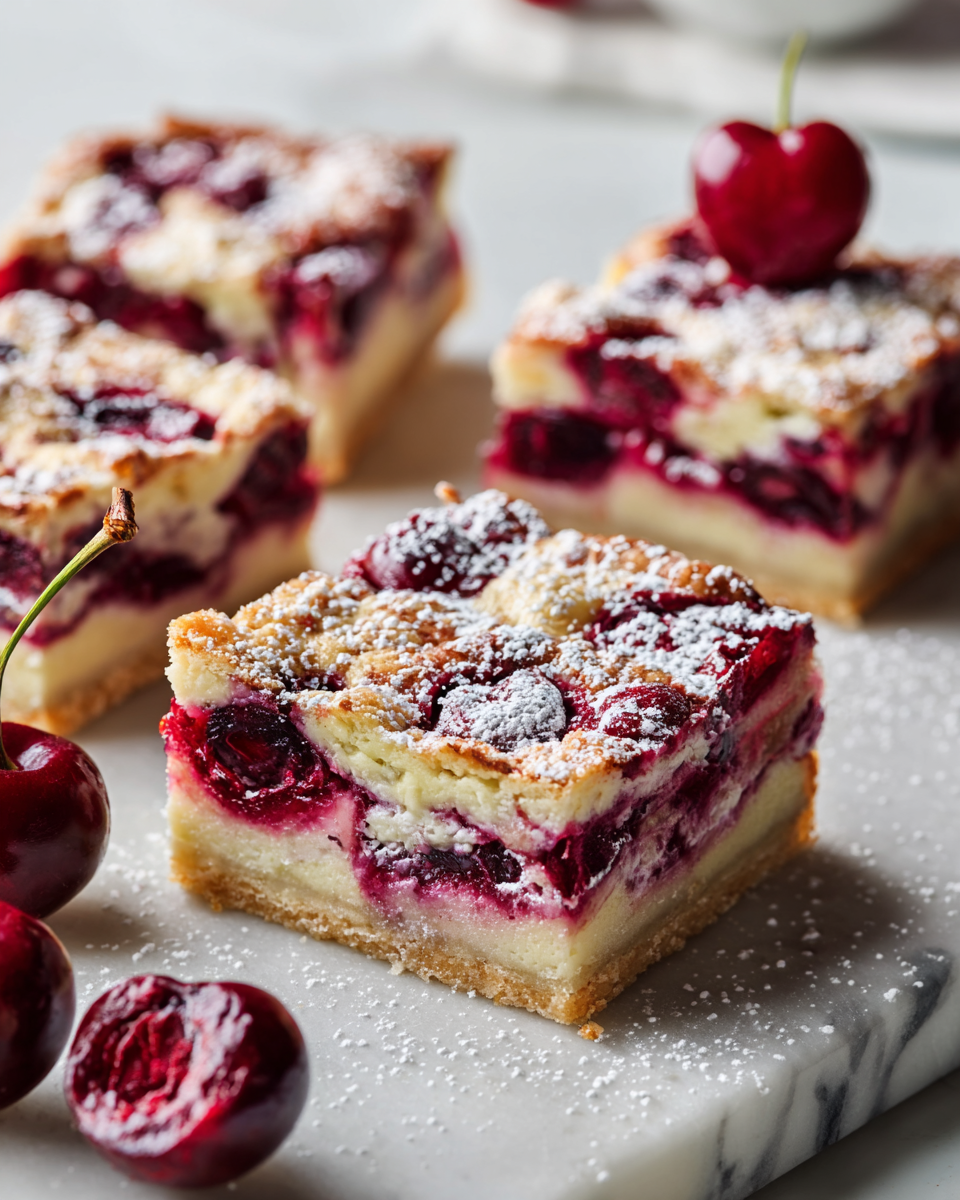
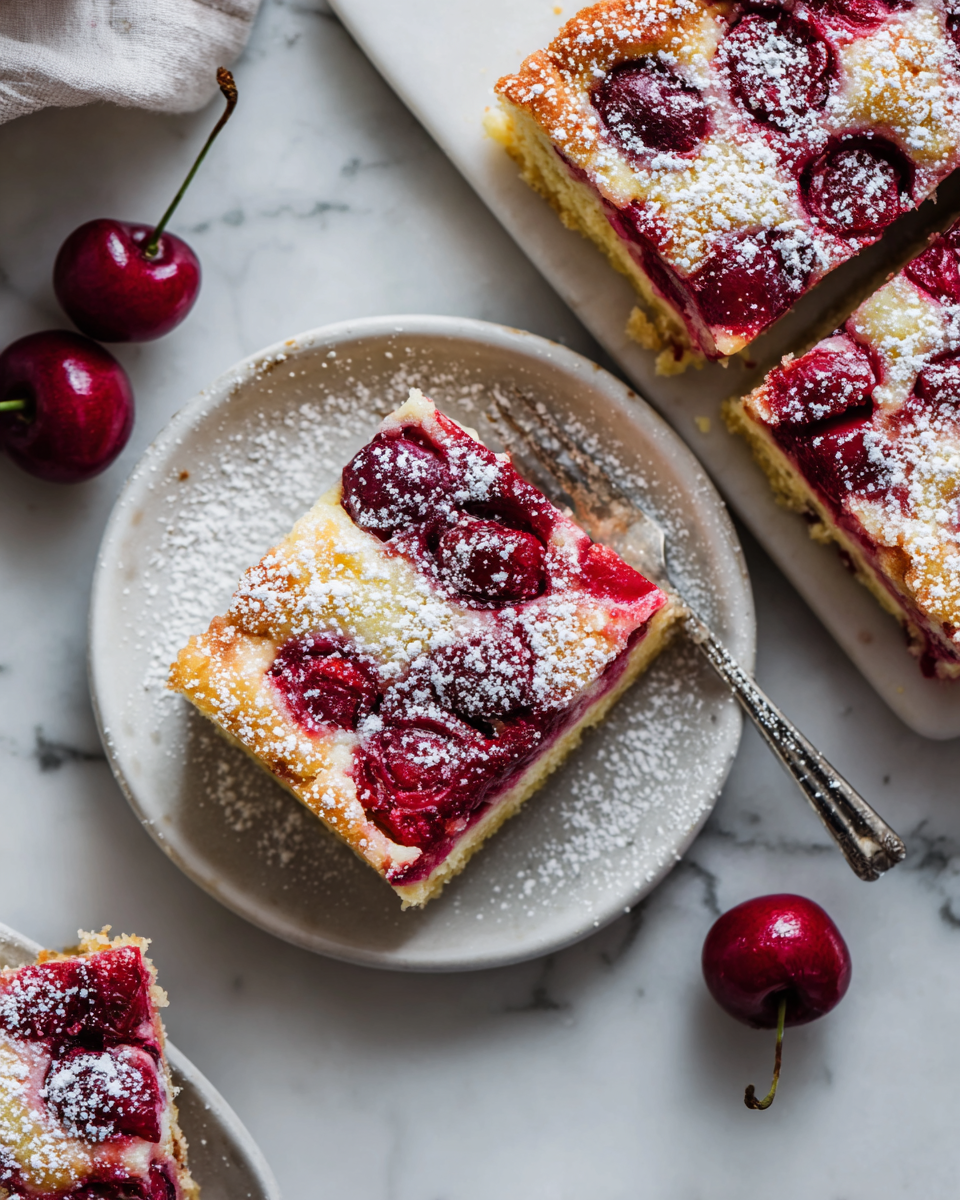
These Cherry Sour Cream Pie Bars are a delightful combination of sweet cherries and creamy filling, perfect for cozy gatherings.
As the crisp air of autumn transitions into winter here in New York City, I find myself diving into the comforting world of baked goods. There's something about the season that awakens the baker in me, especially with upcoming festivities like Thanksgiving and Christmas around the corner. One recipe that has beautifully captured my heart-and soon, I believe, will capture yours-is the Cherry Sour Cream Pie Bars. These bars are not just a delightful dessert; they embody layers of flavor and a nostalgia that transports me to cozy family gatherings.
A Cozy Holiday Treat
Why You'll Love This Recipe
- Deliciously balances sweet cherries with tangy sour cream for a unique flavor experience.
- Easy to make with simple ingredients, perfect for bakers of all skill levels.
- A comforting dessert that evokes nostalgia and is perfect for holiday gatherings.
- Can be made in advance, allowing for stress-free entertaining.
- Leftovers are even more flavorful the next day!
Ingredients
This recipe requires just a few simple components:
Crust:
- 1 cup all-purpose flour
- ¼ cup granulated sugar
- ½ cup unsalted butter, softened
Filling:
- 1 cup sour cream
- 2 large eggs
- ½ cup granulated sugar
- 1 teaspoon vanilla extract
- 1 can (21 ounces) cherry pie filling
Topping:
- ¼ cup powdered sugar
How to Make Cherry Sour Cream Pie Bars (Step-by-Step)
Follow these easy steps to create your Cherry Sour Cream Pie Bars:
Step 1: Preheat the Oven
Start by preheating your oven to 350°F (175°C). The moment the heat fills the air, my anticipation builds, knowing that something magical is about to take place.
Step 2: Make the Crust
In a medium bowl, combine the all-purpose flour and granulated sugar. Then, with a handheld mixer on low speed, incorporate the softened butter until the mixture resembles wet sand. As the butter melds with the flour, a sweet, buttery aroma fills the kitchen, hinting at the delicious crust that is about to form.
Step 3: Press and Bake
Firmly press the crust mixture into the bottom of an 8x8-inch baking dish. I like using a flat-bottomed measuring cup to ensure an even layer. Bake for 10 minutes, until slightly golden - the perfect groundwork for the filling!
Step 4: Prepare the Filling
In a separate bowl, whisk together the sour cream, eggs, granulated sugar, and vanilla extract. The mixture should be smooth and glossy. Once your crust has cooled for a few minutes, pour this luscious filling over it and spread it evenly.
Step 5: Add the Cherry Topping
Spoon the cherry pie filling evenly over the sour cream layer. I love to create a pattern with my spoon, allowing some of the white filling to peek through for a beautiful marbled effect.
Step 6: Bake Again
Return the baking dish to the oven and bake for an additional 30-35 minutes. You'll know they're done when the filling has set but still has a slight jiggle in the center. The scent of cherries and vanilla wafting through my apartment during this time always makes me feel festive!
Step 7: Cool and Dust
Once baked, let the bars cool completely in the dish. After they've cooled, sprinkle with powdered sugar to add that touch of winter magic.
Common Mistakes to Avoid
- Don't skip cooling the crust before adding the filling, as it can cause the filling to separate.
- Avoid overmixing the filling; you want a smooth consistency, but overwhipping can add unnecessary air.
- Don't rush the cooling process! Letting them cool fully ensures clean cuts and better flavor as the layers settle together.
Tips and Tricks for Success
- These bars are delightful chilled, but allow them to sit at room temperature for about 15 minutes before serving for the best flavor.
- For a festive touch, consider garnishing with fresh cherries or a dollop of whipped cream when serving.
- If you have leftovers, store them in an airtight container in the fridge for up to five days.
Variations
- Try substituting the cherry pie filling with apple or blueberry for a different flavor profile.
- Replace the sour cream with Greek yogurt for a tangy twist.
- Use a graham cracker crust instead of the traditional crust for a unique texture.
How to Serve
- Serve chilled or at room temperature for a delightful treat.
- Garnish with whipped cream or a dusting of powdered sugar for an elegant presentation.
- Pair with a scoop of vanilla ice cream for an extra indulgent dessert.

Make Ahead and Storage
- Make Ahead: Prepare the crust and filling a day in advance and assemble before baking.
- Storage: Store any leftovers in an airtight container in the refrigerator for up to five days.
- Reheating: To enjoy leftovers, reheat in the oven at a low temperature or serve chilled.
- Freezing: The bars can be frozen before baking for up to three months; thaw in the refrigerator before baking.
Recipe Notes / What I Learned
As I tested this recipe, I discovered that the balance between the sweet cherries and the tangy sour cream creates a flavor profile that's not just satisfying; it's addictive! Next year, I plan to serve these bars as part of my holiday spread-they're sure to be a hit among family and friends.
Yield and Serving Size
Yield: 16 bars · Serving Size: 1 bar
Nutrition Snapshot
Estimated Nutrition Per Serving: ~200 calories · 3g protein · 28g carbs · 10g fat
Recipe by:
Delightful Cherry Sour Cream Pie Bars
Ingredients
Equipment
Method
- Preheat your oven to 350°F (175°C).
- In a medium bowl, combine the all-purpose flour and granulated sugar. Incorporate the softened butter until the mixture resembles wet sand.
- Firmly press the crust mixture into the bottom of an 8x8-inch baking dish and bake for 10 minutes.
- In a separate bowl, whisk together the sour cream, eggs, granulated sugar, and vanilla extract until smooth. Pour this filling over the crust and spread evenly.
- Spoon the cherry pie filling evenly over the sour cream layer.
- Bake for an additional 30-35 minutes until the filling has set but still jiggles slightly in the center.
- Allow the bars to cool in the dish, then sprinkle with powdered sugar.
Notes
FAQs
1. Can I use frozen cherries instead of cherry pie filling?
Yes, you can use frozen cherries in this recipe! Just thaw and drain them before mixing them into the filling. You may need to slightly adjust the sugar based on the tartness of the cherries.
2. How do I know when the Cherry Sour Cream Pie Bars are done baking?
The bars are done when the filling is set but still has a slight jiggle in the center. A toothpick inserted into the filling should come out clean or with just a few moist crumbs.
3. Can I make the crust in advance?
Absolutely! You can make the crust a day ahead and store it in the refrigerator. Just press it into the baking dish before adding the filling.
4. Is there a substitute for sour cream?
If you don't have sour cream, you can use plain Greek yogurt as a substitute for a similar tangy flavor and creamy texture.
5. How should I store the Cherry Sour Cream Pie Bars?
Store any leftovers in an airtight container in the refrigerator for up to five days. The flavors will continue to meld together, enhancing the taste!