
Ready in: 4 hours (plus chilling time) · Serves: 8 · Technique: No-Bake · Storage: Refrigerate for up to 5 days.
Quick Answer
This no-bake cheesecake is a simple yet elegant dessert that lets you enjoy the holiday season without the hassle of baking.
As the holiday season rolls around in New York City, the crisp air is filled with anticipation, from bustling holiday markets to cozy gatherings with friends and family. One delightful dessert that always finds its way onto my table during gatherings is the creamy, rich no-bake cheesecake. With its creamy vanilla flavor and the buttery crunch of the crust, it's a dessert that captures the essence of celebration without the fuss of baking. This no-bake cheesecake recipe is a fantastic choice for Thanksgiving and Christmas, letting you spend more time with loved ones and less time in the kitchen.
A Delectable Holiday Delight

Why You'll Love This Recipe
- Easy to prepare with no baking required, saving you time in the kitchen.
- Rich and creamy texture that melts in your mouth, perfect for special occasions.
- Customizable with various toppings or flavor additions to suit your taste.
- Can be made ahead of time, making it ideal for holiday gatherings.
- Deliciously versatile, pairs wonderfully with fruits or chocolate sauces.
Ingredients
This no-bake cheesecake uses simple ingredients that combine for a luxurious dessert.
For the crust:
- 1 and ½ cups graham cracker crumbs (preferably Honey Maid)
- ½ cup unsalted butter, melted
For the cheesecake filling:
- 16 ounces cream cheese, softened (Philadelphia recommended)
- ½ cup granulated sugar
- 1 teaspoon vanilla extract
- 2 cups heavy whipping cream
How to Make No-Bake Cheesecake (Step-by-Step)
Creating this delicious no-bake cheesecake is a breeze and allows you to impress your guests without the need for baking.
Step 1: Prepare the crust
Start by gathering your graham cracker crumbs in a large mixing bowl. Pour in the melted unsalted butter and mix until the mixture resembles wet sand. Press this mixture firmly into the bottom of a springform pan to create an even layer and refrigerate while you make the filling.
Step 2: Make the filling
In a large mixing bowl, add the softened cream cheese and beat it until it's smooth and creamy. Gradually mix in the granulated sugar and vanilla extract until glossy.
Step 3: Whip the cream
In a separate bowl, whip the heavy cream until stiff peaks form, transforming it into fluffy clouds of sweetness.
Step 4: Combine the mixtures
Gently fold the whipped cream into the cream cheese mixture using a spatula until no streaks remain, preserving that airy texture.
Step 5: Assemble the cheesecake
Pour the cheesecake filling over the prepared crust and spread it evenly. Cover with plastic wrap and refrigerate for at least four hours, or preferably overnight for the best results.
Step 6: Serve
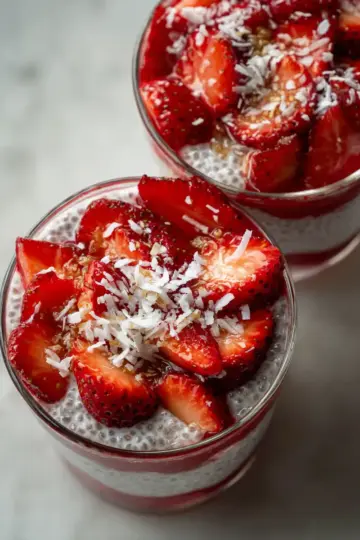
Once chilled and set, carefully remove the sides of the springform pan and serve plain, or add festive toppings like raspberry compote or chopped nuts.

Common Mistakes to Avoid
- Skipping the cream cheese softening: Don't rush this step! If your cream cheese is still cold, it won't blend smoothly and your filling will be lumpy.
- Overmixing the whipped cream: Once you've achieved stiff peaks, stop mixing. Overwhipping can lead to a grainy texture, which we definitely want to avoid.
- Not chilling long enough: Patience is key! If you're tempted to serve it too soon, you'll miss out on that ideal set texture.
Tips and Tricks for Success
- Customization: Feel free to add different flavors! A swirl of melted chocolate or fruit purée can take this cheesecake to new heights.
- Serving: Serve with fresh fruit or a drizzle of chocolate sauce to complement the flavors.
- Make Ahead: This cheesecake can be made up to a week in advance, making it the perfect holiday dessert!
Variations
- Use crushed Oreo cookies for the crust instead of graham crackers.
- Add lemon zest for a citrusy twist in the filling.
- Incorporate peanut butter into the cheesecake mixture for a nutty flavor.
- Top with caramel sauce and chopped apples for a fall-inspired dessert.
How to Serve
- Serve plain or with a drizzle of chocolate sauce.
- Garnish with fresh berries or mint leaves for a pop of color.
- Pair with whipped cream or a dollop of sour cream for added flavor.
- Consider serving in individual cups for a fun presentation.

Make Ahead and Storage
- Make Ahead: This cheesecake can be made up to a week in advance, making it the perfect holiday dessert!
- Storage: Store leftover no-bake cheesecake in the refrigerator, tightly covered with plastic wrap, for up to 5 days.
- Reheating: This cheesecake is best served cold and does not require reheating.
- Freezing: Freezing is not recommended as it can alter the texture of the cheesecake.
Recipe Notes / What I Learned
During my trials with this no-bake cheesecake, I discovered that allowing the cake to set overnight truly transforms its texture, making each slice even creamier. Plus, it's a fantastic make-ahead dessert that's sure to impress my guests, giving me more time to enjoy the festivities!
Yield and Serving Size
Yield: 10 · Serving Size: 1 slice
Nutrition Snapshot
Estimated Nutrition Per Serving: ~400 calories · 6g protein · 30g carbs · 32g fat

Recipe by:
Delicious No-Bake Cheesecake for Holiday Gatherings
Ingredients
Equipment
Method
- Start by gathering your graham cracker crumbs in a large mixing bowl. Pour in the melted unsalted butter and mix until the mixture resembles wet sand. Press this mixture firmly into the bottom of a springform pan to create an even layer and refrigerate while you make the filling.
- In a large mixing bowl, add the softened cream cheese and beat it until it’s smooth and creamy. Gradually mix in the granulated sugar and vanilla extract until glossy.
- In a separate bowl, whip the heavy cream until stiff peaks form, transforming it into fluffy clouds of sweetness.
- Gently fold the whipped cream into the cream cheese mixture using a spatula until no streaks remain, preserving that airy texture.
- Pour the cheesecake filling over the prepared crust and spread it evenly. Cover with plastic wrap and refrigerate for at least four hours, or preferably overnight for the best results.
- Once chilled and set, carefully remove the sides of the springform pan and serve plain, or add festive toppings like raspberry compote or chopped nuts.
Notes
FAQs
Can I use low-fat cream cheese for this recipe?
While you can use low-fat cream cheese, it may affect the overall texture and creaminess of the cheesecake. Full-fat cream cheese provides the best results for a rich and satisfying dessert.
How long should I let the cheesecake set in the refrigerator?
It's best to let the cheesecake set for at least four hours, but overnight is ideal. This allows it to firm up properly for the best texture.
Can I make this cheesecake gluten-free?
Yes, you can make this cheesecake gluten-free by using gluten-free graham cracker crumbs for the crust. Be sure to check the labels to ensure all ingredients are gluten-free.