Ready in: 6 hours 10 minutes · Serves: 16 · Technique: Stovetop · Storage: Airtight container for up to two weeks.
Quick Answer
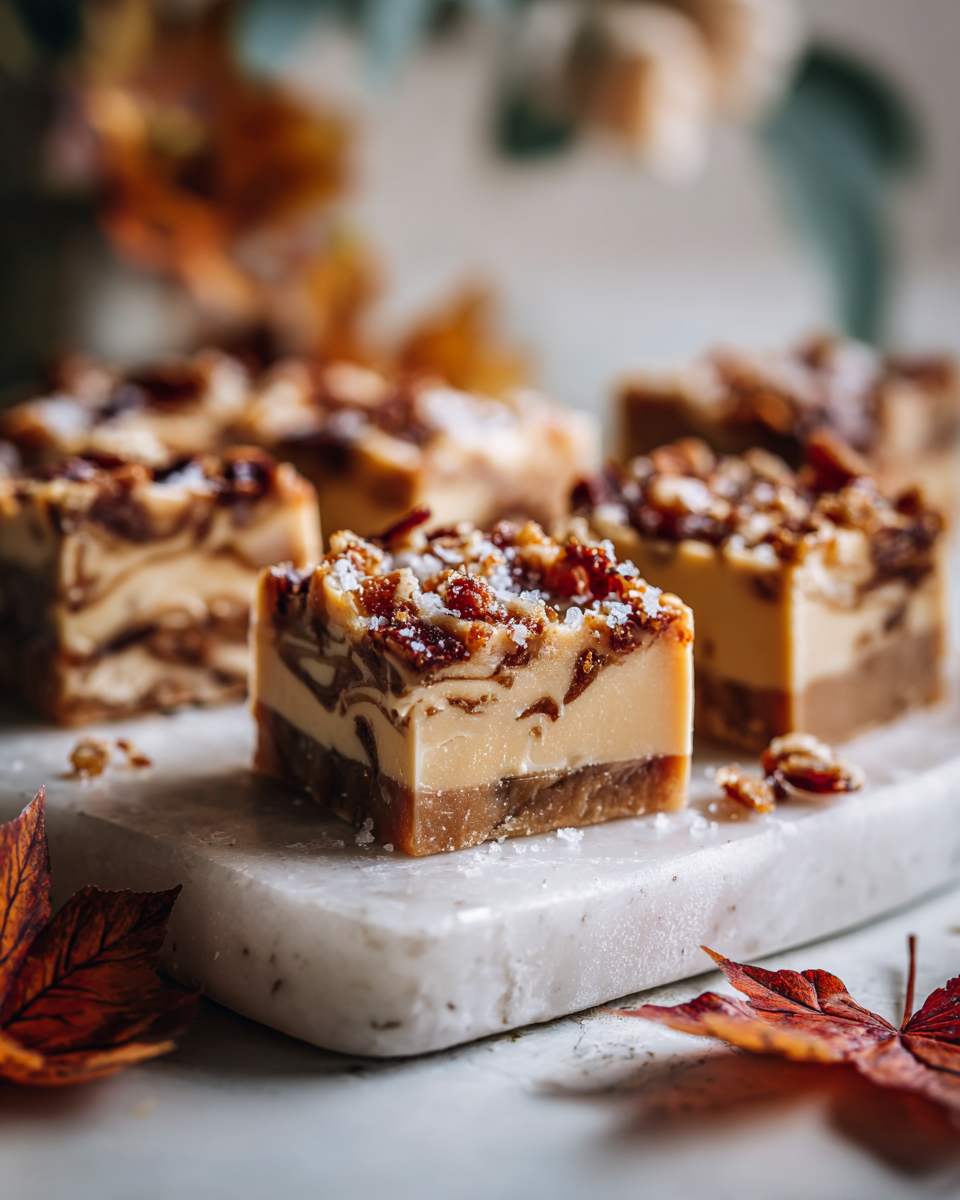
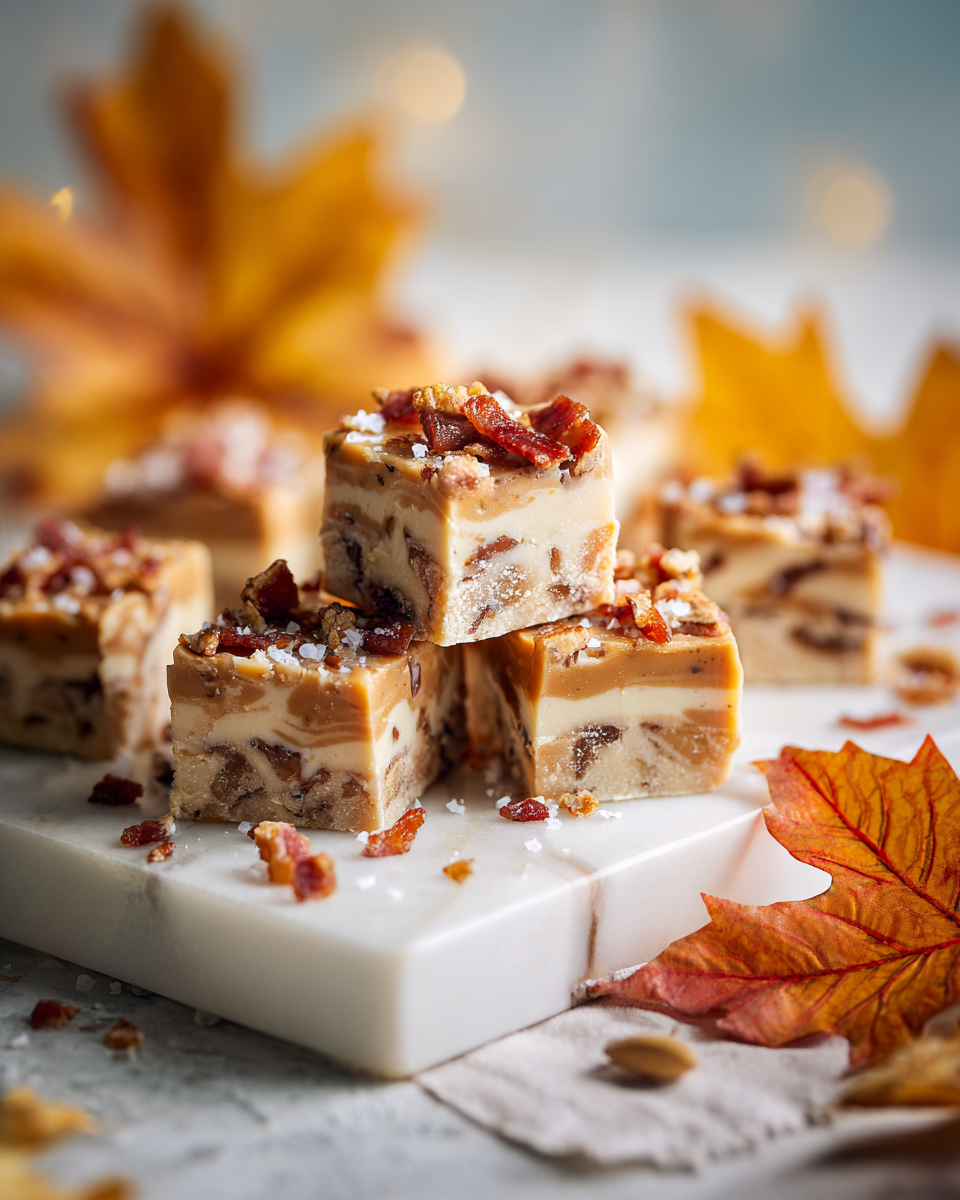
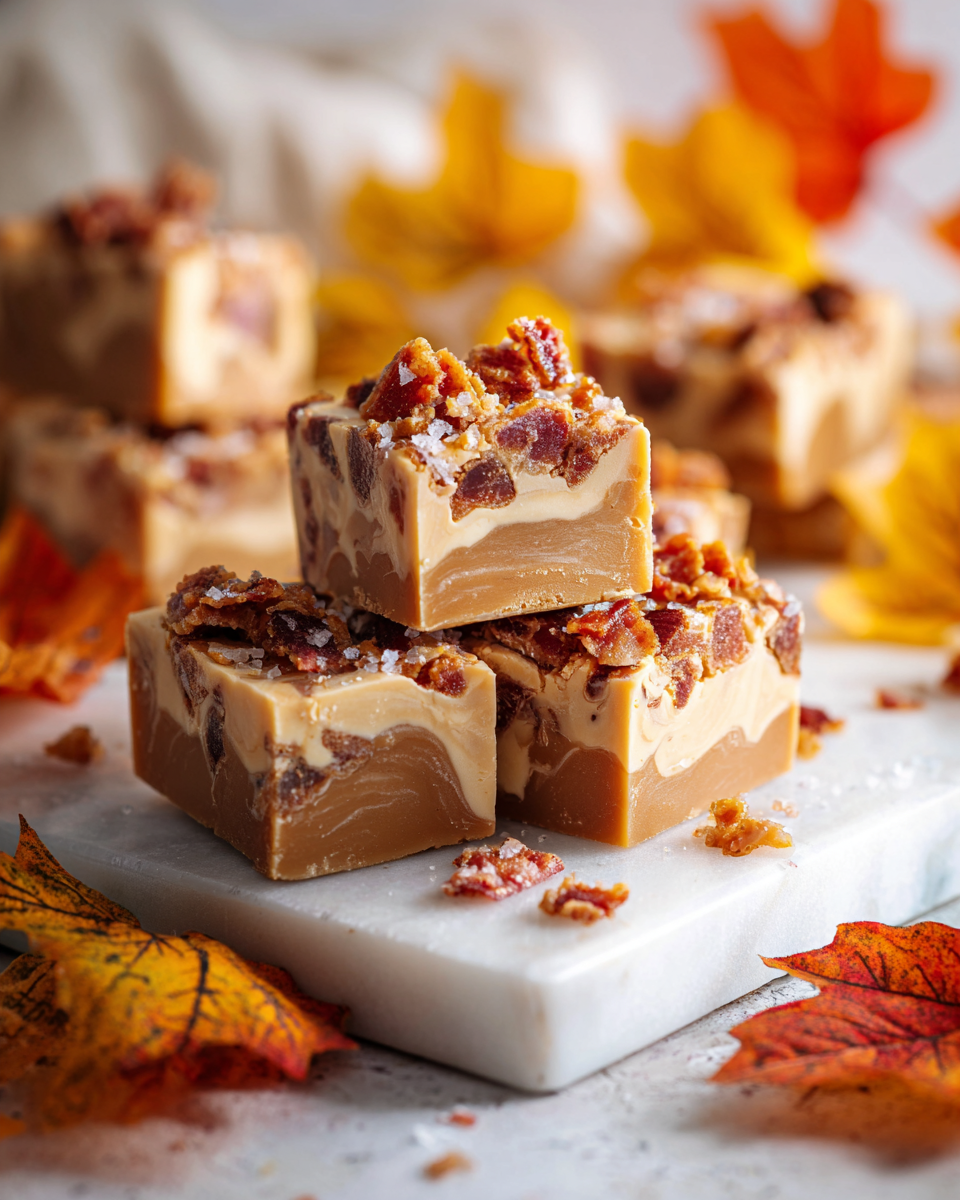
This Maple Bacon Fudge combines the rich sweetness of maple with savory bacon for a unique seasonal treat.
As the crisp autumn air settles over New York City and the leaves transform into hues of amber and gold, the holiday season rushes in with cozy gatherings and festive laughter. This year, I'm excited to share a delightful treat that encapsulates the essence of fall: Maple Bacon Fudge. Imagine the rich, sweet aroma of maple syrup blending seamlessly with the savory crunch of crispy bacon, all suspended in creamy, smooth fudge. This indulgent confection makes for an extraordinary gift during Thanksgiving celebrations or as a sweet addition to your Christmas dessert table.
A Cozy Holiday Treat
Why You'll Love This Recipe
- Unique flavor combination of sweet maple and savory bacon.
- Perfectly creamy texture that melts in your mouth.
- Easy to make with simple ingredients found in your pantry.
- A great gift idea for the holiday season.
- Ideal for sharing with friends and family during festive gatherings.
Ingredients
Get ready to gather these simple yet delicious ingredients for your Maple Bacon Fudge:
Base Ingredients
- 1 cup of unsalted butter (two sticks)
- 2 cups of light brown sugar
- 1 cup of pure maple syrup (the good stuff)
- 1 cup of sweetened condensed milk
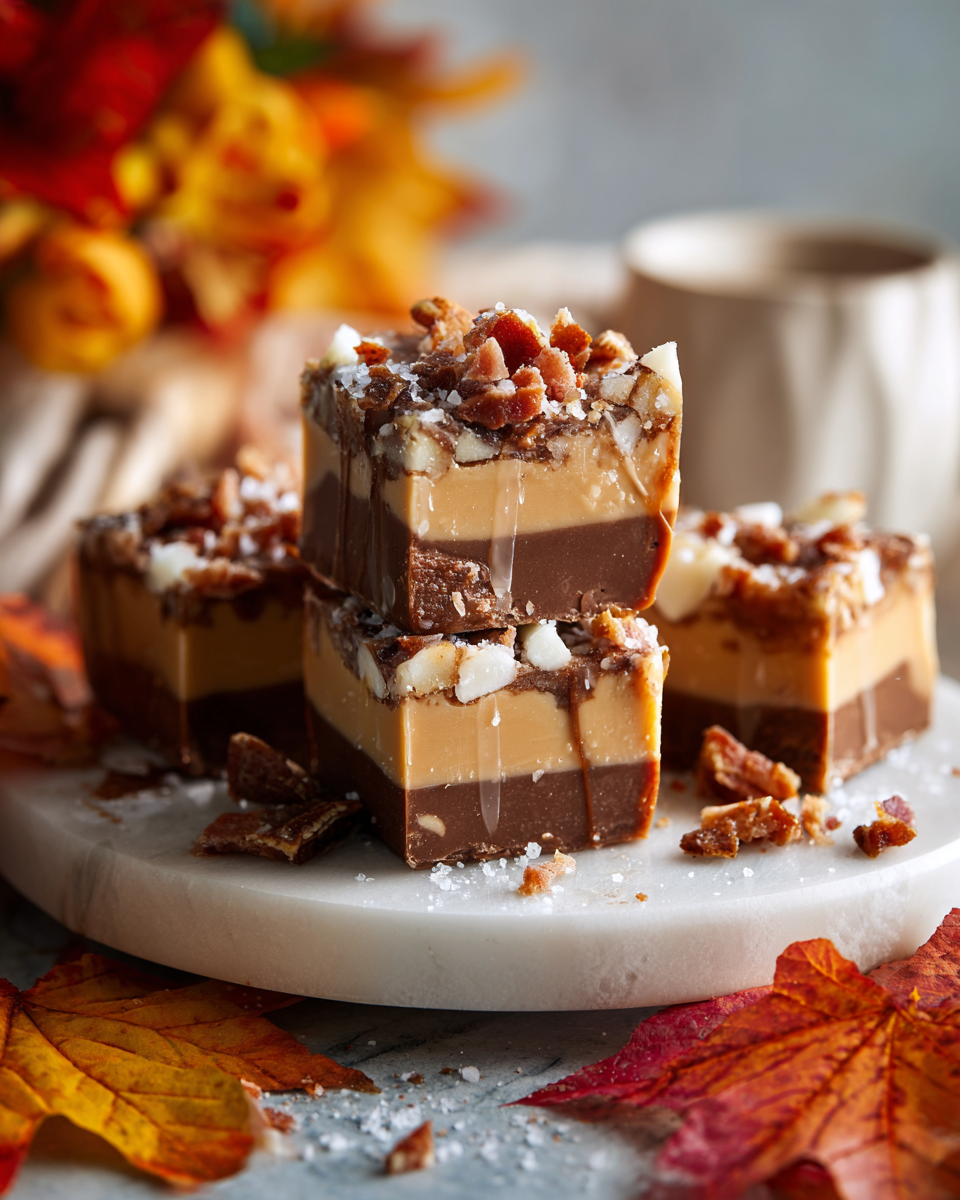
- 3 cups of semisweet chocolate chips
- ½ teaspoon of vanilla extract
Bacon Topping
- 1 cup of cooked and crumbled bacon (about 6-8 slices)
- ½ teaspoon of flaky sea salt (for garnish)
How to Make Maple Bacon Fudge (Step-by-Step)
Follow these simple steps to create your Maple Bacon Fudge:
Step 1: Prepare the Pan
Start by lining an 8x8-inch square baking dish with parchment paper, leaving a bit of an overhang on the sides. This will help you lift the fudge out once it's set.
Step 2: Melt the Butter
In a medium saucepan over medium heat, melt 1 cup of unsalted butter. As it melts, let the nutty aroma fill your kitchen-this is the precursor to the wonderful flavors that will develop.
Step 3: Combine the Sugars
Once the butter has melted, stir in 2 cups of light brown sugar and 1 cup of pure maple syrup. Whisk until the mixture becomes glossy and well-combined, usually around 2-3 minutes.
Step 4: Add Condensed Milk
Pour in 1 cup of sweetened condensed milk. This will create a creamy foundation for your fudge. Stir continuously for another 3-4 minutes until it reaches a gentle boil.
Step 5: Incorporate Chocolate
Reduce the heat to low and add 3 cups of semisweet chocolate chips. Stir until melted and the mixture is smooth; don't be afraid to let it bubble a bit-just keep stirring until the chocolate blends beautifully with the syrupy mixture.
Step 6: Mix in Flavor
Once the chocolate has melted completely, remove the saucepan from heat and stir in ½ teaspoon of vanilla extract and most of the crumbled bacon, reserving some for topping.
Step 7: Transfer to the Pan
Pour the fudge mixture into your prepared baking dish, using a spatula to spread it evenly. Leave a little space at the top for your beautiful bacon garnish.
Step 8: Garnish
Sprinkle the reserved bacon and flakes of sea salt on top, creating a satisfyingly sweet and salty contrast that will make every bite delightful.
Step 9: Chill
Let the fudge cool at room temperature for about 2 hours, then transfer to the refrigerator. Allow it to set for about 4 hours, or overnight for the best results.
Step 10: Cut and Serve
Once set, lift the fudge from the pan using the parchment overhang. Cut into small squares, and enjoy!
Common Mistakes to Avoid
- Don't Rush the Melting Process: Melting the butter and combining it with sugar should be done over medium heat to prevent burning. Patience is key!
- Skip the Garnish: Skipping the sea salt and bacon garnish will take away from the flavor contrast that makes this fudge truly special.
- Overmix the Bacon: When mixing in the bacon, fold gently to avoid breaking it down too much, maintaining its delightful texture.
Tips and Tricks for Success
- Use high-quality, pure maple syrup for an authentic flavor. It makes a world of difference in this recipe.
- Choose thick-cut bacon for a heartier bite, and be sure to cook it until it's nice and crispy.
- Store the fudge in an airtight container in the fridge for up to two weeks. You can also freeze it for longer storage; just layer parchment between pieces to prevent sticking.
Variations
- Substitute walnuts or pecans for bacon for a vegetarian option.
- Use dark chocolate chips instead of semisweet for a richer taste.
- Include a hint of cinnamon or nutmeg for a festive twist.
How to Serve
- Cut into small squares and serve on a decorative platter.
- Pair with a warm cup of coffee or hot chocolate for a cozy treat.
- Wrap pieces in cellophane as individual gifts for friends and family.
Make Ahead and Storage
- Make Ahead: Prepare the fudge ahead of time and store it in the refrigerator until serving.
- Storage: Store the fudge in an airtight container for up to two weeks in the fridge.
- Reheating: No reheating necessary; serve chilled or at room temperature.
- Freezing: Freeze cut fudge squares for up to two months, layering parchment paper between pieces to prevent sticking.
Recipe Notes / What I Learned
Through testing this recipe, I discovered how the infusion of savory bacon elevates sweet treats into something truly memorable-it's the perfect blend of sweet and salty that leaves everyone wanting more. Plus, sharing this fudge with friends and family has made for some truly heartwarming moments during the holiday season!
Yield and Serving Size
Yield: 36 pieces · Serving Size: 1 piece
Nutrition Snapshot
Estimated Nutrition Per Serving: ~200 calories · 2g protein · 25g carbs · 10g fat

Recipe by:
Maple Bacon Fudge
Ingredients
Equipment
Method
- Start by lining an 8x8-inch square baking dish with parchment paper, leaving a bit of an overhang on the sides. This will help you lift the fudge out once it’s set.
- In a medium saucepan over medium heat, melt 1 cup of unsalted butter. As it melts, let the nutty aroma fill your kitchen—this is the precursor to the wonderful flavors that will develop.
- Once the butter has melted, stir in 2 cups of light brown sugar and 1 cup of pure maple syrup. Whisk until the mixture becomes glossy and well-combined, usually around 2-3 minutes.
- Pour in 1 cup of sweetened condensed milk. This will create a creamy foundation for your fudge. Stir continuously for another 3-4 minutes until it reaches a gentle boil.
- Reduce the heat to low and add 3 cups of semisweet chocolate chips. Stir until melted and the mixture is smooth; don’t be afraid to let it bubble a bit—just keep stirring until the chocolate blends beautifully with the syrupy mixture.
- Once the chocolate has melted completely, remove the saucepan from heat and stir in ½ teaspoon of vanilla extract and most of the crumbled bacon, reserving some for topping.
- Pour the fudge mixture into your prepared baking dish, using a spatula to spread it evenly. Leave a little space at the top for your beautiful bacon garnish.
- Sprinkle the reserved bacon and flakes of sea salt on top, creating a satisfyingly sweet and salty contrast that will make every bite delightful.
- Let the fudge cool at room temperature for about 2 hours, then transfer to the refrigerator. Allow it to set for about 4 hours, or overnight for the best results.
- Once set, lift the fudge from the pan using the parchment overhang. Cut into small squares, and enjoy!
Notes
FAQs
1. How do I know when the fudge is set?
The fudge is set when it is firm to the touch, which usually takes about 4 hours in the refrigerator. For the best results, it can also be left to set overnight.
2. Can I use a different type of syrup?
While the recipe calls for pure maple syrup for the best flavor, you can experiment with other syrups, but it may alter the overall taste and texture of the fudge.
3. Is there a vegan alternative for this recipe?
You can try using vegan butter and dairy-free chocolate chips, along with a plant-based sweetened condensed milk alternative to make a vegan version of this fudge.
4. How do I prevent the fudge from being too sticky?
Ensure that the fudge is cooked long enough so that it reaches the right consistency. Also, allow it to cool completely before cutting into squares.
5. Can I add nuts or other toppings?
Absolutely! You can add chopped nuts or other toppings to the fudge mixture before it sets, but be sure they complement the flavors of maple and bacon.